Wednesday, May 29, 2013

Diamond Chain - Piecing Instructions

*** I've been training the person who is taking over my job at work, preparing for my last day [today], getting everything squared away for starting my new job on Monday...all last week I kept telling my friends and coworkers that I thought I was forgetting something, but I had everything on my work checklist done. Turns out I forgot to push "Publish" on this post! D'oh!


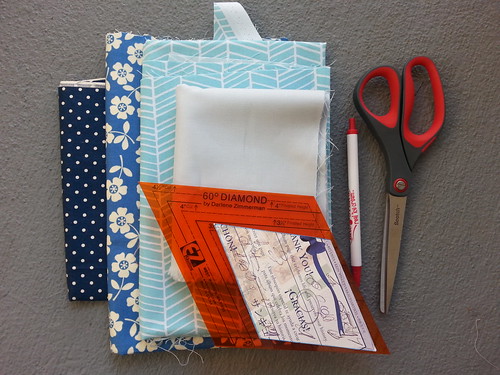
Ok everyone! Hopefully you have everything all cut out so we can start some chain piecing today.


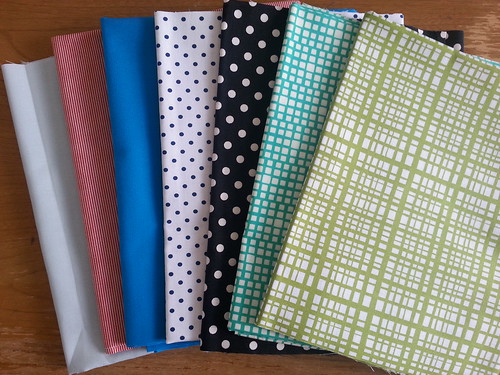
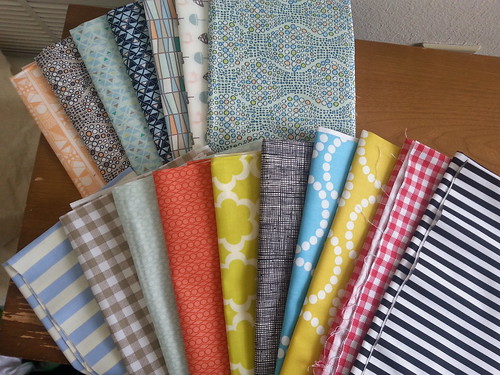
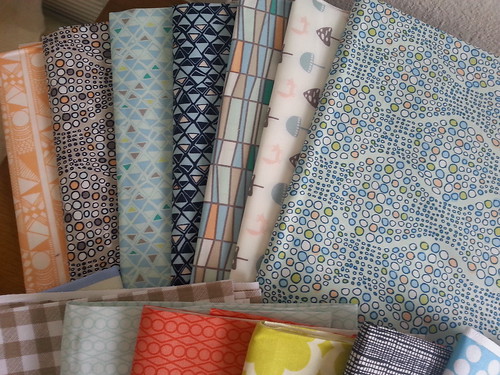
If you're going scrappy and cutting all your diamonds out individually then I'd recommend laying out your blocks before sewing. That's what I did for my scrappy mini version to get the placement as I desired.


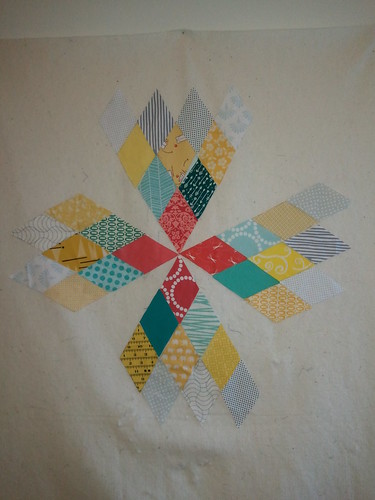
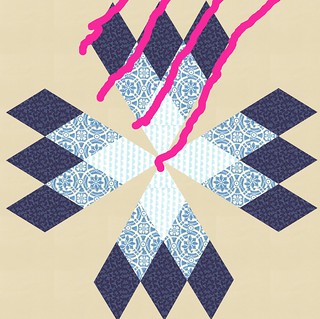
Sew your rows together following the diagram above. You only have diamonds at this point, so you don't have to worry about the corner pieces. Diamonds work the same way as triangles when sewing them together -- you have to offset one of the pieces by 1/4" to account for the seam allowance and have the pieces line up once you press the seam open.


You will have these little handy dog ears after sewing your diamonds together. Don't trim them yet!

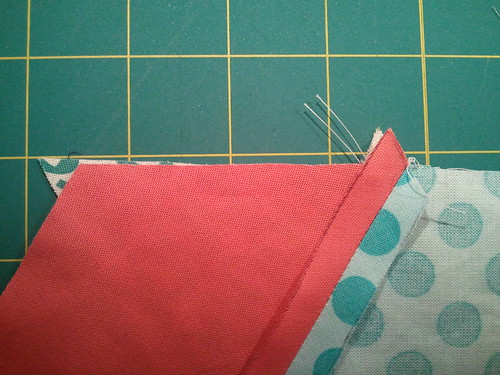
Instead you can use them to help you line up your rows of diamonds. How handy :) As you can see, the top strip is offset to the right by 1/4", but the dog ears line up. This will help you sew those rows perfectly! Press those seams open as well.

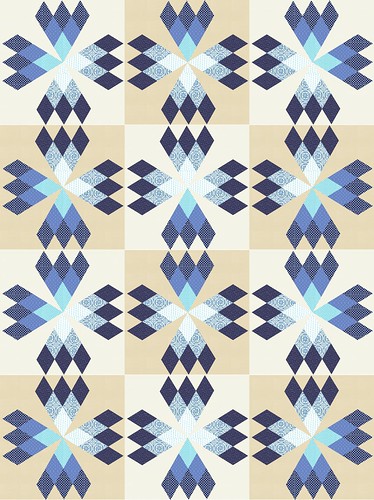
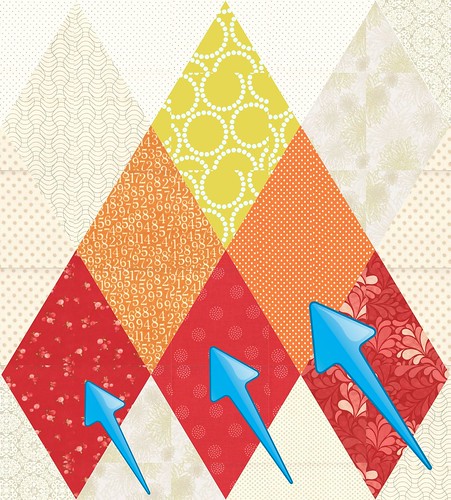
You will continue sewing four of these units to create a single block. The quilt requires 12 blocks, so you will have 48 of the little diamond "rockets". Or at least I think they look like rockets.

Now on to the next method: 


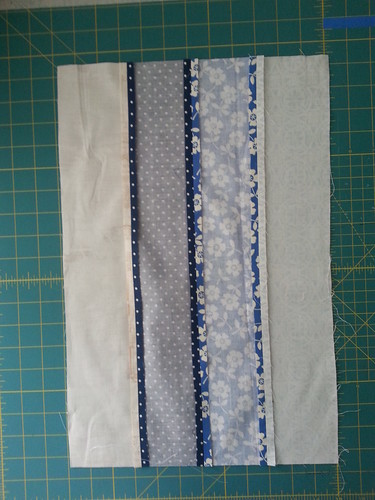
For those of you who are strip piecing, you will arrange your strips as desired [mine are going from light to dark] with the background strip on the outside. Sew together and press seams open.


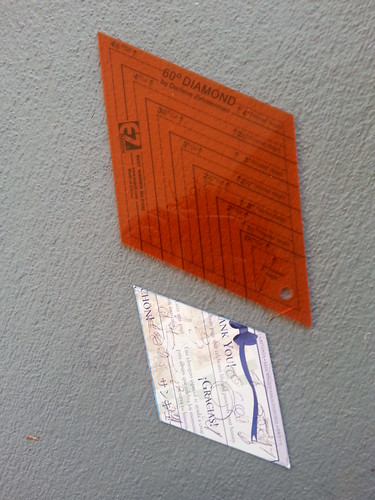
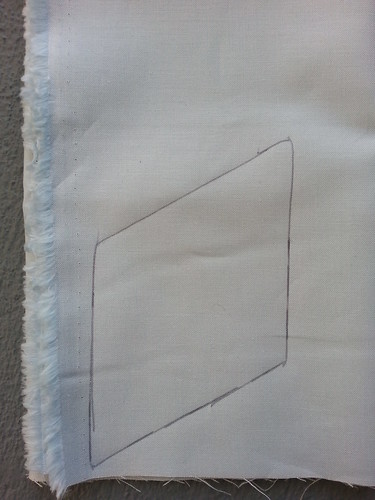
To cut the diamond strips, align your ruler at a 60 degree angle, or use the 60 degree mark on your cutting mat. Line your ruler up at the very corner to get the most out of your strips. Make sure you start at the corner that is NOT on the strip of your background fabric [so don't be like me, my ruler is lined up opposite]. You'll notice that there will be some fabric waste, but we can use those pieces in a variety of ways!


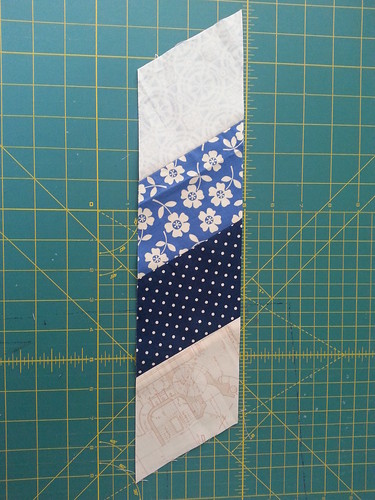
You will be left with a strip of diamonds! Yay!


This gives you an idea of how this will work out. You will sew your next set of strips using just the medium blue, dark blue, and background fabric. Another set of strips will be just the dark blue and background fabric. So you're doing three sets of strips to accomplish your diamond rows.

You can use the extra pieces that we were considering fabric waste [the pieces of your sets of strips that you can't get a full strip of diamonds out of] and piece them together to create another full strip of diamonds.

In the previous method we were able to use the dog ears to line up our strips when sewing them together, but sadly you just have to be more diligent with your pinning or offsetting the strips. You will be sewing a strip of 4 diamonds, 3 diamonds, 2 diamonds, and a single diamond together. Create 48 of these units for your blocks.

Please let me know if this is confusing...I know that everyone's brain works differently, so this might not click for people. I'm happy to help!

***Alright, we're actually going to push my original schedule back by a week to account for my forgetfulness and crazy schedule right now. So this week will be piecing the "rocket" units and next week we will add in the corner pieces to create the blocks.


See you next week. For realz this time. I promise this on the fluffyness of my brand new baby kitty :) Even though his arrival meant that I had to pack up all my sewing stuff so he can't get into any trouble.

Sunday, May 19, 2013

Me-Made-May Update


Top row: Megan Nielsen Banksia in a polyester blend, Self-drafted top in coral knit, Sew Liberated Schoolhouse Tunic in cotton seersucker

Bottom row: Self-drafted skirt in pima cotton, Grainline Scout Tee in lace, Grainline Scout Tee in cotton silk

Thoughts about Me-Made-May so far:

1. Actually wearing some of the clothes has reconfirmed some fit issues that some of them have

2. I like making shirts - I have several dresses in the next week though

3. I finished up those two Grainline Scout Tees just so I could wear them, so MMM is helpful for my productivity!

4. I really wanted to take pictures of me actually living my life while wearing my handmade clothes, so my pictures are taken at (1) a farewell work lunch, (2) outside on a lounging day, (3) at a Mexican restaurant for Cinco de Mayo, (4) outside my office, (5) at Tijuana Flats for lunch with coworkers, (6) outside my apartment during a day that I took off to have craft day with friends

5. I find it really hard to wear some of my clothes to work because they sway between too casual or too fancy for some of my workdays. I run youth programs [for the next two weeks, at least] and sometimes I'm outside running around after kids and sometimes I have meetings at City Hall. I've been finding it very hard to plan out my clothes since I don't usually know what might crop up until the day before. That's actually why I made my last Grainline Scout Tee in a cotton silk, because it's casual when worn with shorts, but the fancier fabric dresses it up if I want to wear it to work. I think that was an important realization for me to come to.

6. I don't necessarily want to keep buying so many clothes at Target, but I wish that I had access to cooler prints to make my own clothes. I hardly wear florals, I'm more of a geometric, mod, tribal print, polka dot kind of gal, and there just aren't too many prints out there that I've found that I like. I need to go to NYC! ;)

7. I'm two days behind. That last picture was taken on a Friday, which is technically in the 3rd week of May. However, I'm not going to beat myself up about it, because I'm still adhering to the spirit of MMM, which is just to actually wear your handmade items.

I can't wait to see what the next two weeks bring!

Thursday, May 16, 2013

Diamond Chain Quilt Along - Cutting Instructions


Hello all! Today we're going to tackle the majority of the cutting for the Diamond Chain quilt!


Supplies:
-Your fabric
-A marking tool of your choice
-60 degree diamond template if you have one [for the scrappy cutting version]
-Template plastic or sturdy cardboard
-Scissors

We're actually going to discuss two options for cutting. We will start with the cutting of individual diamonds.


If you are going for a scrappy look [this quilt is great for that because the diamonds aren't too big!] then you can cut your diamonds individually. We are using 3.5" UNfinished diamonds.

One thing to be careful of is if you're using a cardboard template make sure that your shape doesn't start to get warped over time from tracing around the carboard.


You will need:
-192 background diamonds
-108 dark blue diamonds
-96 medium blue diamonds
-48 light blue diamonds


Your next option is if you are using a cohesive fabric scheme. That is, your quilt will look much like the mock-up at the top of the page in that I've used the same fabrics for the rings of diamonds in each block. You can even use this method if you're alternating blocks, like the example above.


We will be strip piecing our fabrics for this method, so you will need to cut all strips to 3.5 x 18".

You will need:
-12 light blue strips
-24 medium blue strips
-36 dark blue strips
-48 background strips

If you want to use 2 dark blue fabrics, for instance, just cut 18 strips of each, and so on.

Note: We are not cutting our corner pieces until that week in the schedule, because they can be a little confusing.

Next week we will be sewing our pieces together to create the triangle pieces for our blocks. Please know that if you cut diamonds this week you will only be sewing next week. If you cut strips, we will be sewing the strips together and then doing additional cutting and then more sewing. So basically, those of you cutting individual diamonds will require more time this week, while the strip cutters will require more time next week. It all balances out :)

See you next week with all your pieces!

Wednesday, May 15, 2013

Colette Laurel Contest


Eep!

My green linen Laurel is one of 20 finalists for the Reader's Choice in the Laurel Contest! The winner gets $500 in prizes [swoons on the inside].

You can vote for your top 5 favorites by scrolling to the bottom of the post! :)

Tuesday, May 14, 2013

Giveaway Day winner!


I'm so sorry I'm a little late on this, but the Sew, Mama, Sew! Giveaway Day winner is Karen Chatters, who loves the Pow Wow pattern! So I guess that's my next quilt too ;) I've emailed Karen yay!

And because some people mentioned being curious in what kind of advice was given, this is what people said about fitting sewing into the work week:

1. "Work on a little bit at a time because it all adds up eventually"
2. "Sew for 15 minutes a day"
3. "Schedule your time or else it won't end up happening"
4. "Ignore the housework!" [favesies]
5. "I have no idea because I have no time to sew either"
6. "Get up early and sew before the day starts"

I'm trying to make #6 work...so far I've managed to wake up earlier, but I haven't actually managed to make it out of bed yet. Baby steps, right?


In other news, Me-Made-May is trucking along. This was my outfit from today - a lace Grainline Scout Tee with a linen skirt from Target. I'll be doing a mid-month outfit update this weekend.

And I don't know about you all, but I have had a fabulous day. I got a job offer [that I'm accepting!], received payment from Stitch magazine, had free salted caramel truffle ice cream from Haagen Dazs, and had lunch out with friends. It doesn't get much better than that :)


Friday, May 10, 2013

Fabric Requirement for Diamond Chain

Good morning all, and a happy Friday to you!

First up, don't forget that all the Sew, Mama, Sew giveaways end today at 5, so if you haven't yet entered those, get going!


And now on to those fabric requirements that I promised you earlier this week. I meant to get them up yesterday, but I burned my hand really badly [reason number 96 I don't like alfredo sauce] so I spent the night feeling sad ha. Anyways!

This quilt uses 20 inch blocks, with 12 blocks total, for a 60 x 80 inch quilt. For that size you will need:

-3 yards background fabric [the cream in my mock-up]
-2 yards for the outer ring of diamonds [dark blue]
-1 and 1/3 yards for the second ring of diamonds [medium blue]
-3/4 yd for the inner ring of diamonds [light blue]
-Backing fabric

****SUPER IMPORTANT NOTE: These fabric requirements were made using the tool in the Threadbias Design Tool that I used when designing the quilt. I am like 88% sure that you will not need that much background fabric, because the only way you can fill in weird spaces in the design tool is by making the background be just a large rectangle that you layer under your design.

Also, these requirements are made for keeping all the diamonds in each ring the same color. If you want a scrappy look, just divide the required fabric amount by how many different colors of that level that you want to use. For instance, if you have 4 dark blue fabrics that you want to use, dividing 2 yards by 4 will give you 1/2 yd of each.

And for even having that little bit of math on my blog this early in the morning, I'm going to deliver happy news too:

Jennifer of Knotted Thread has graciously extended us a 15% to her Etsy shop for this informal quilt-along. Use the code SEWFESTIVE15 at checkout! She has a fabulous low-volume bundle that would be perrrrfect for the background and lots of saturated prints in a rainbow of colors. How great would Notting Hill be in this quilt!

And also, Jennifer is just a super nice person, so make sure you go say hi on her blog and visit her shop. She's living the dream - Hawaii AND opening a fabric shop?! #jealousonthemainland :)

I'm headed to an early meeting - my boss just left for Africa to adopt a baby, and so all hell has broken loose as to what to do for 4 months in her absence. This kind of meeting requires a really big cup of coffee...TGIF!


Tuesday, May 7, 2013

Projects in Stitch with Style 2013

I was going to spend this entire post talking about the progress I've made on my Mother's Day project [spoiler alert: not much] but then I read Sara's post about the release of the Stitch with Style 2013 projects...


And I have several projects in the magazine! I'd like to introduce you to:


the Transitional Dress


and the Retro Restyled Blouse

I have another smaller hair clip project in the magazine as well. And phew, I'm so glad that I can finally own up to these projects. Because OHMYGOSH it was so stressful. This was all done over the holidays, and I was working on like 204+ projects all at once.


And this dress was easily the hardest project I've ever tackled. In fact, deep in the midst of it I thought I had bitten off more than I could chew. I had a really hard time grading the pattern myself, only to turn it in and find out that I didn't even need to because they started offering pattern grading on project submissions. I almost wanted to cry when the editor told me that. I also made up two versions, since they wanted to see some changes to the neckline. I think the version above was first. Maybe? It all runs together.

Anyways, I'm really proud of myself for submitting the sketch of the dress and seeing my idea to the finish. I'm a little wary of going through the process again, because I sure got torn down a lot before I built myself back up. But it's still exciting to see it all shake out in the magazine :)

Monday, May 6, 2013

Diamond Chain Quilt-Along


I've received such a great response from my mini quilt that I sent off for the Fab Little Quilt Swap that I decided to make up a tutorial and quilt along for anyone who is interested.

Instead of having to wait for a full tutorial that will take me several weeks to get finished, I figured it might be more fun if we do this together! So starting next week I'll be posting up a few steps at a time once a week.


The blocks are 20 inches, so if you just want a mini or a pillow you only have to make one! The entire quilt only requires 12 blocks -- I love big blocks! Plus there's a lot of options for different fabric placements. I like how changing up the fabric slightly can highlight circles within the diamonds, or changing up the background fabrics can make it glitter a little more :)

I'll be listing a blank coloring sheet and fabric requirements in a few days so that you have time to get some fabric if you want to play along.

Thursday May 16: Cutting Instructions
Thursday May 23: Piecing the Diamonds
Thursday May 20: Adding the Corner Triangles and Assembling the Block
Thursday June 6: Finishing the Quilt Top and Backing
Thursday June 13: Quilting and Binding

Sew, Mama, Sew! Giveaway Day


Folks, I almost forgot about Sew, Mama, Sew! Giveaway Day. That would have been a travesty, to be sure.

For those of you who are here for the first time, welcome! I recently had a tutorial for a smocked pillow up at Sew, Mama, Sew! and I just completed a mini quilt that I'm working to turn into a free pattern for you all, since I received a lot of positive feedback. So make sure you stick around these parts :)

On to the giveaway!


I've never made a quilt from a pattern before, so today's prize is just that...a quilt pattern! You have your choice of one of the three above, because those are all the ones that I'm most interested in right now. Please leave a comment as to which pattern you'd like - if you work, I'd love to hear your tips and tricks as to how you fit sewing into the work week [because I'm failing miserably lately].

I will draw the winner at the end of this week and email the corresponding PDF pattern. You don't have to be a follower [although I'd love it if you were] and international entries are welcome.

And because I love everyone, not just the lucky person who gets a pattern, you can use the code GIVEAWAYDAY in my Etsy shop for 20% off everything, including Potter Patterns! The coupon will run through Saturday May 11th.

Cheers everyone!


Sunday, May 5, 2013

Om nom nom fabric

Between the Sew, Mama, Sew! fabric sale and the Pink Castle sale, lots of fabric has come into my house recently:


From Sew, Mama, Sew!:


From Pink Castle Fabrics:


You'll notice that I bought quite a few cuts of Indian Summer by Sarah Watson for Art Gallery because that collection's blender type fabrics are exactly what would be printed on all my clothing if I could make it work that way. It's absolutely my style. And because Art Gallery fabric is yummy and silky, I have to decide what prints to order more of for clothing :)

Oh, and now I have to sew lots, because my fabric cabinet is full again!

Thursday, May 2, 2013

Smocked Pillow Tutorial at Sew, Mama, Sew!

Smocked Pillow Tutorial at Sew, Mama, Sew! by Sew Festive
Smocked Pillow Tutorial at Sew, Mama, Sew!, a photo by Sew Festive on Flickr.

Today is icky and rainy, ew. BUT I do have a tutorial for this beautiful smocked pillow up at Sew, Mama, Sew! and I couldn't be more excited to share it! 

I also plan to list this pillow on Etsy, so if anyone is interested in having a pillow like this without having to make it yourself then just shoot me an email and I'll give my readers a discount on it :)